Let’s Create a Geometric Pattern in Illustrator With Ease!

What’re these ABC tutorials are about?
There are a lot of design tutorials you can find right now. Tons of them! So why should the one even bother with starting another design blog? The idea is simple: I’m going to bring you my ABC tutorials that will help you nail core and powerfull techniques in a few easy steps. What to do with these skills is up to you!
After nine easy steps from this tutorial, you will find out how to create geometric patterns in Adobe Illustrator. So, let’s do it!
Want to do this tutorial using the same design as I do? Just download the assets below.
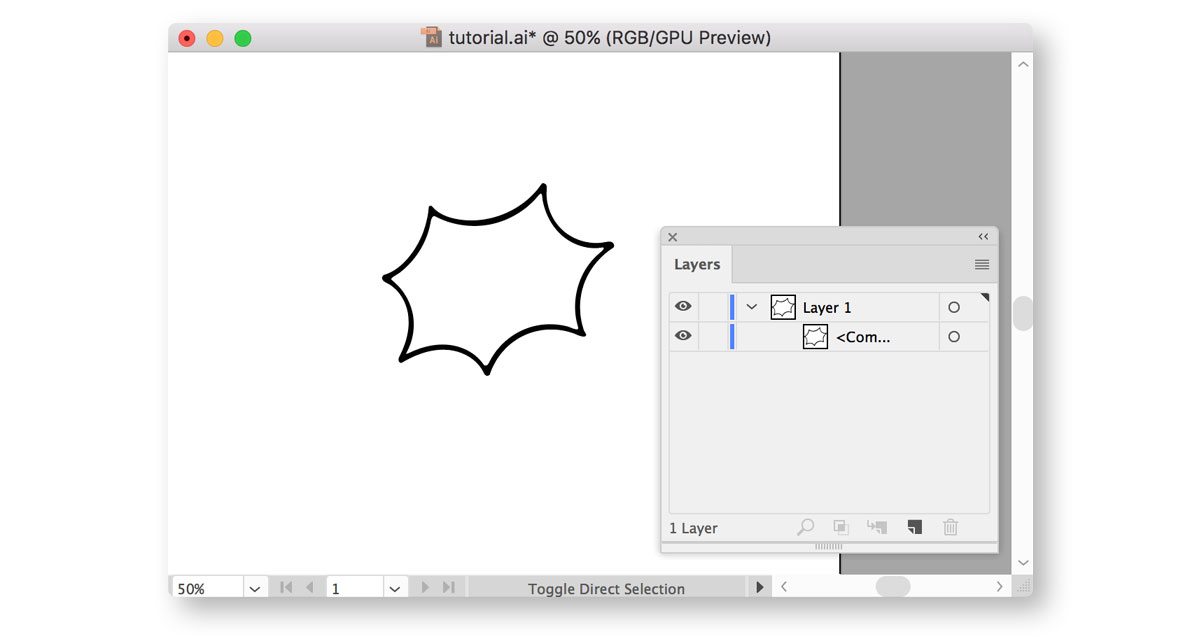
Step 1.
Start with a new AI document and a vector shape on it. It can be anything you want, like a simple circle or a square. I’ve picked something more sophisticated for my pattern.
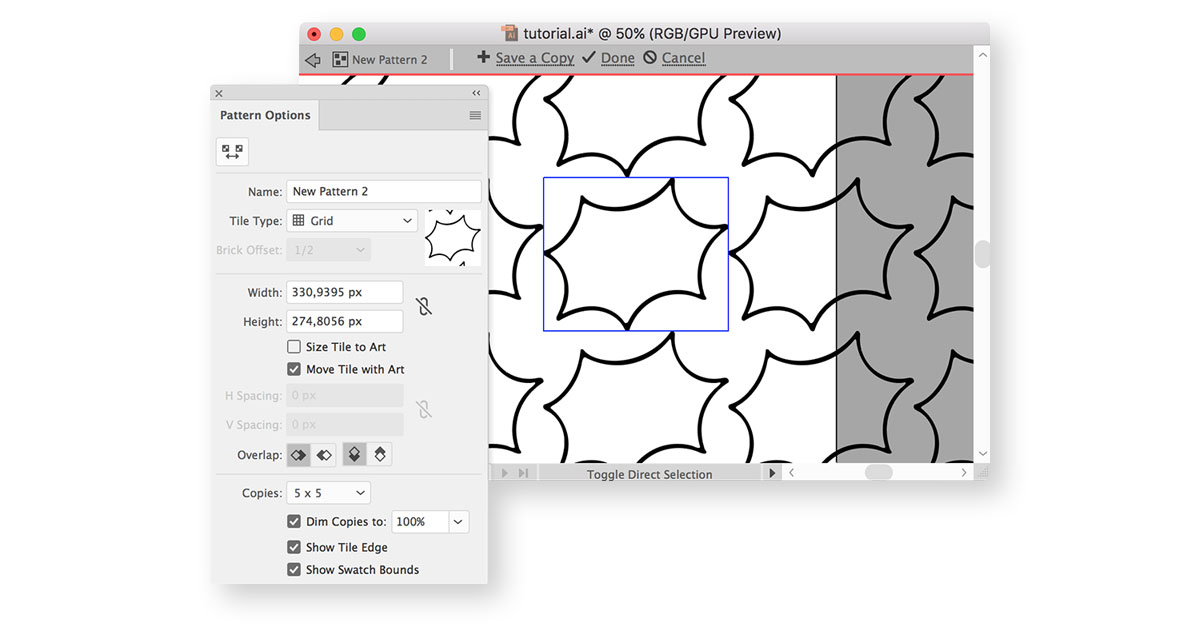
Step 2.
Now, select your artwork and choose Object > Pattern > Make. What you see is a preview of your future pattern filling the free area of the document. All further changes you make to your artwork will be reflected in this preview.
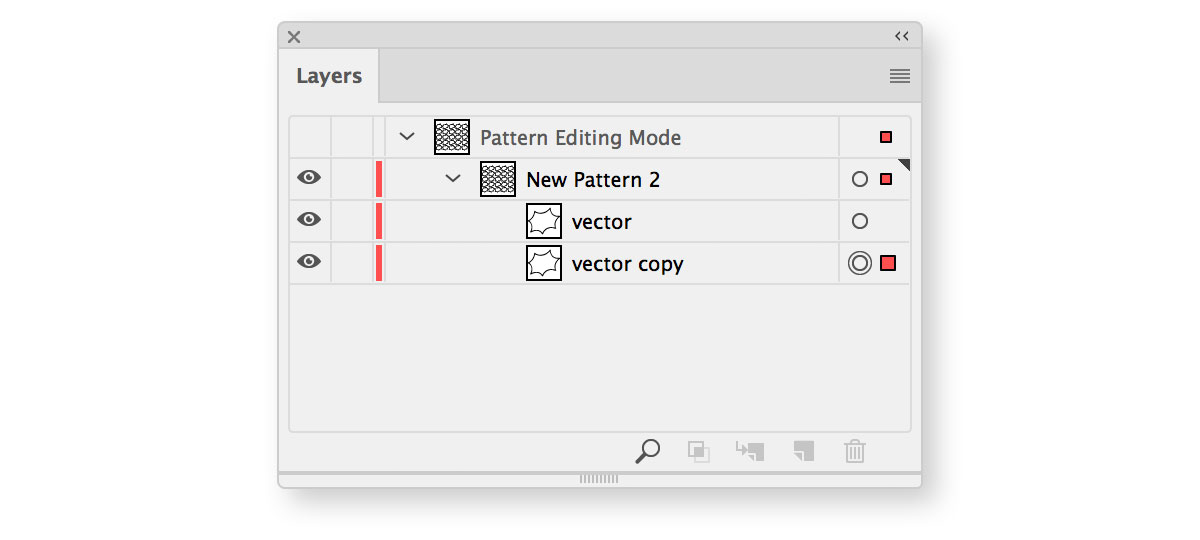
Step 3.
What we need now is your imagination 🙂 You can keep your vectors monochrome or bring some nice colors! Add some elements as well to make it even more original! That’s how you can do it: open panel Window > Layers. Choose your vector and make a copy of it (by holding Alt and dragging it to a new position in the Layers panel).
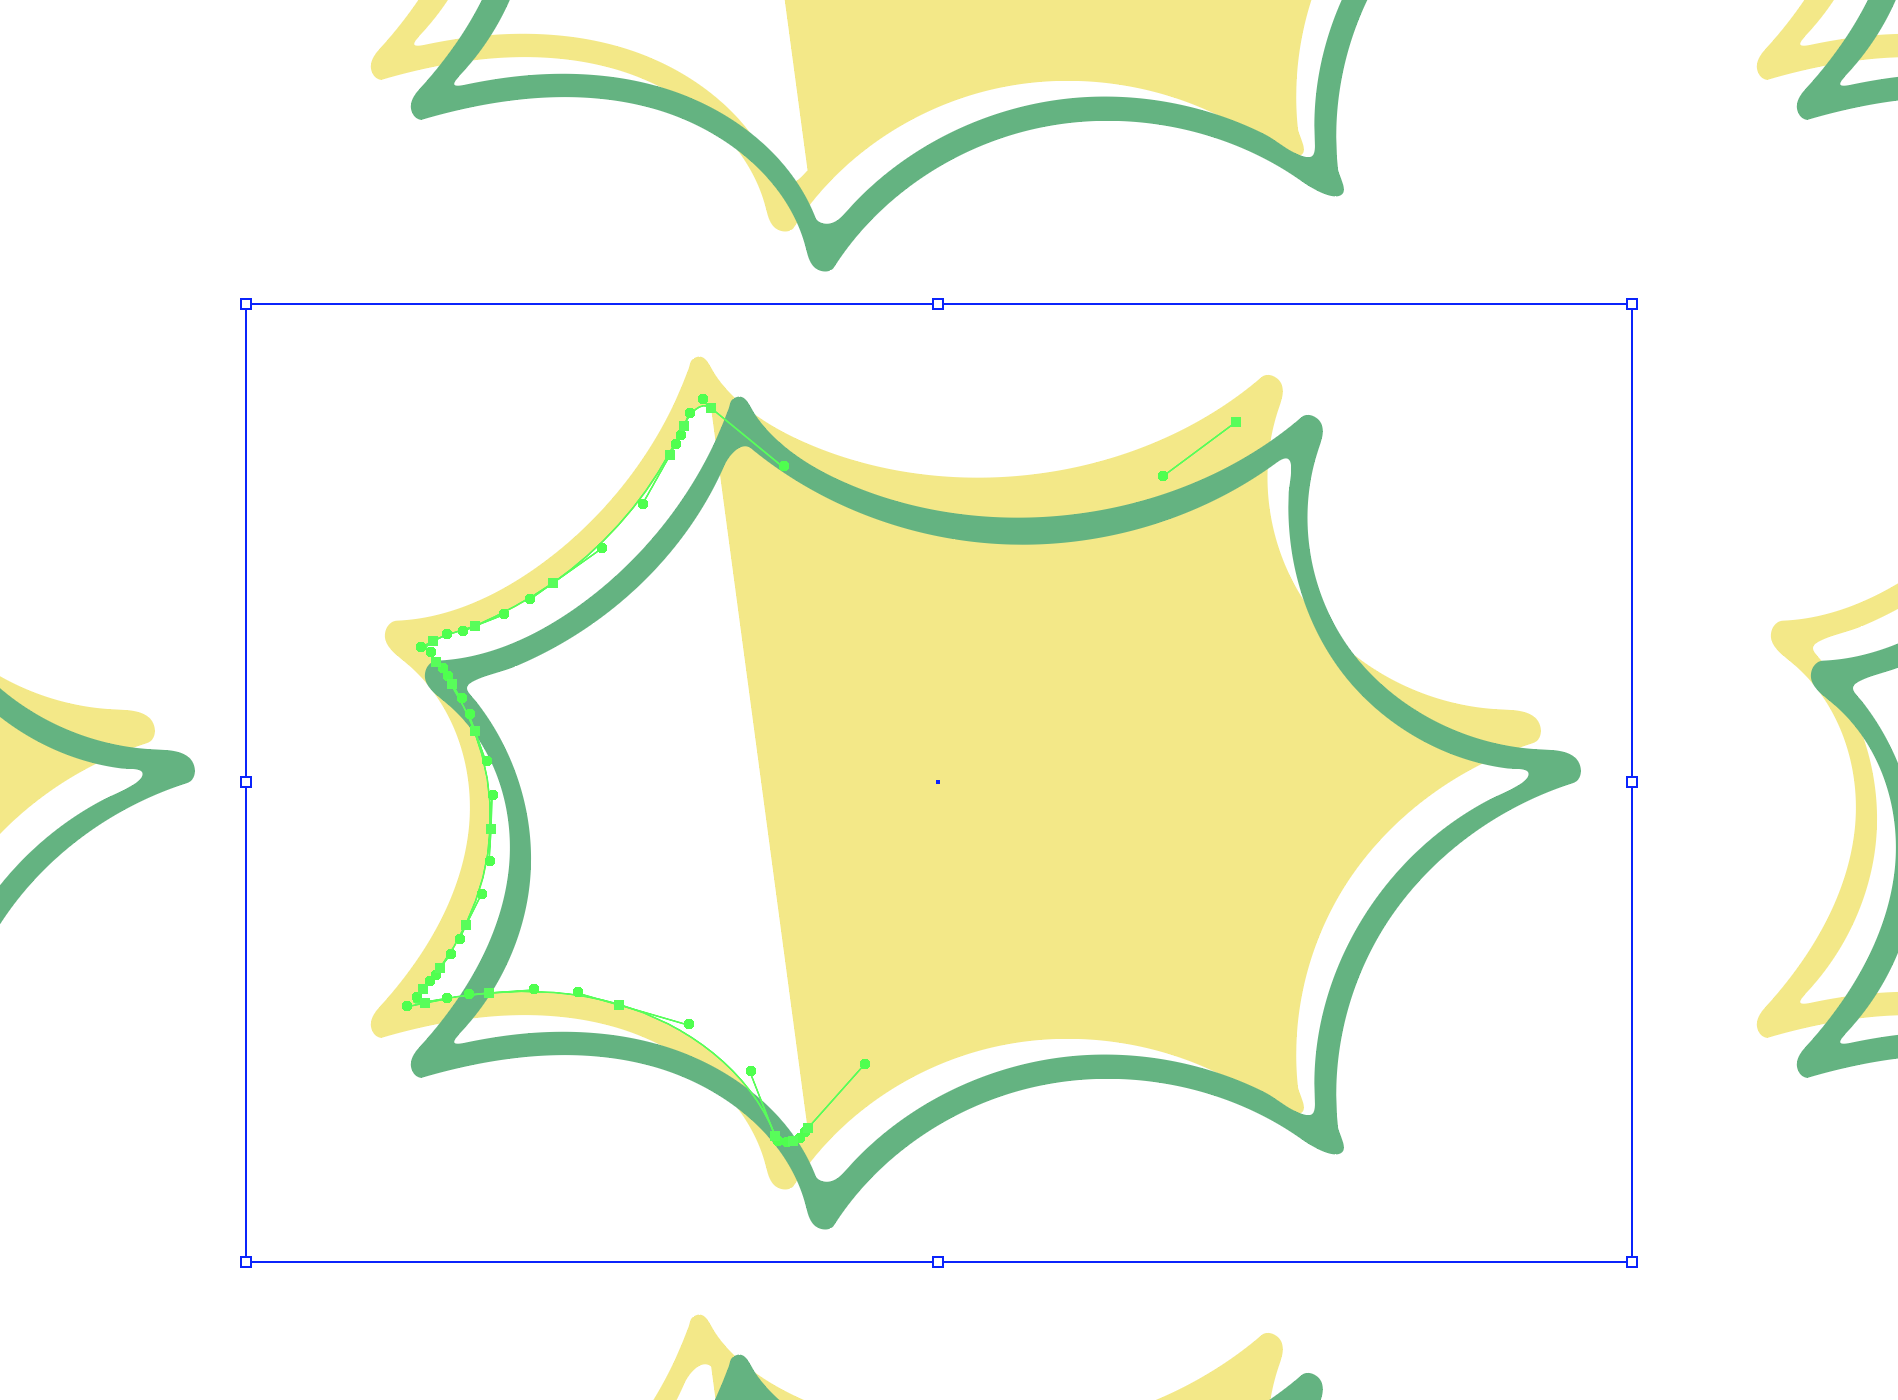
Step 4.
Let’s say one of your vectors would be yellow (#f3e982) and its copy would be green (#62b57f). Fill the shapes, using Color Tool on the left panel.
Step 5.
Now select the yellow shape (with Direct Selection Tool (A)) and delete inner line to make it solid. Then move green shape for 20 px down and 20 px right.
Step 6.
Let’s add some dots with Paintbrush Tool (B) and fill them with green color (#62b57f).

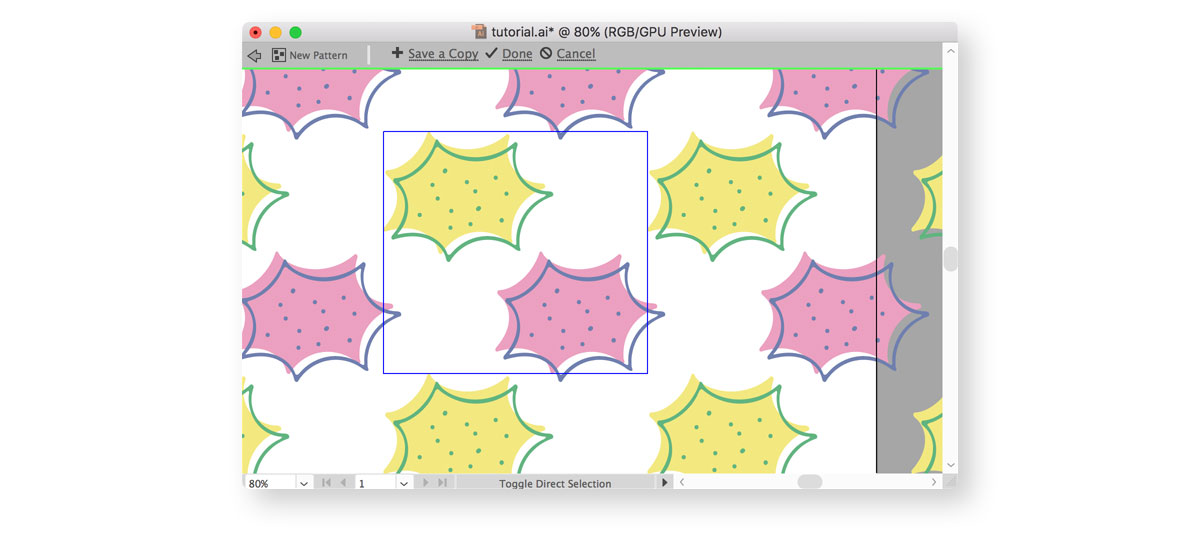
Step 7.
Once it’s done, create a copy of the composition you have, and change its colors: yellow to pink (#eca0c0) and green to blue (#6f7faf).
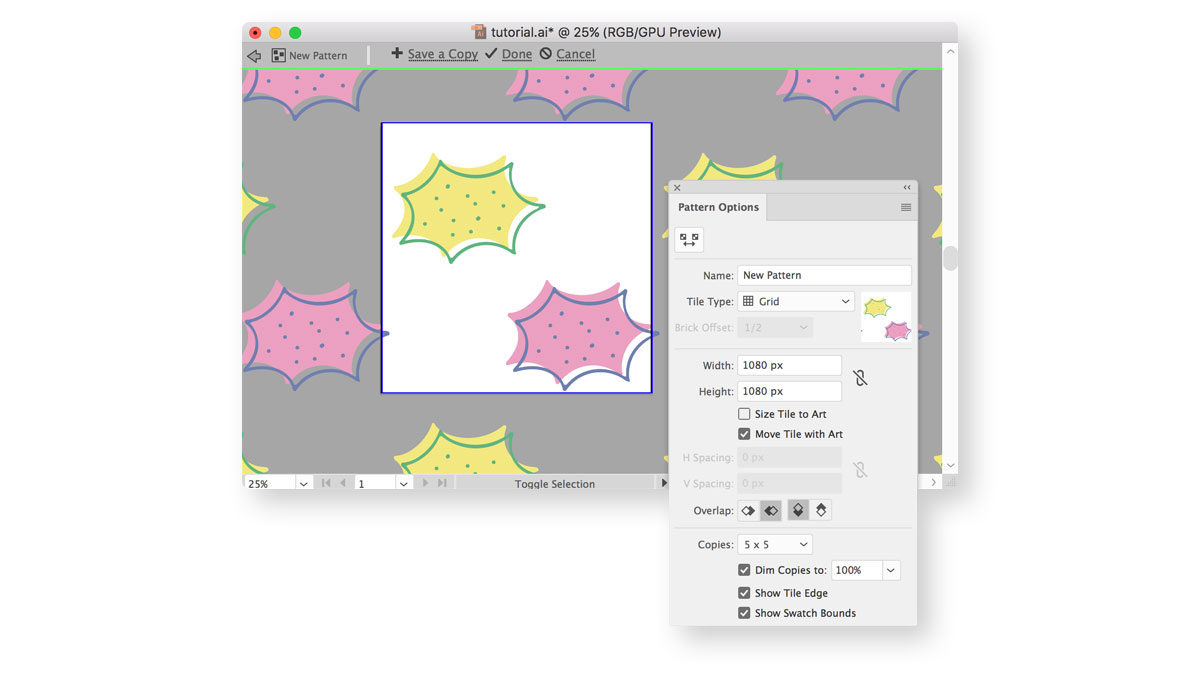
Step 8.
We can finish our pattern by choosing a Tile Type in the Patterns Options panel. Pick the Grid type. Of course, you can try to apply other Tile Types and use the one you like most, but if you’re about to export your pattern and use it outside Adobe Illustrator as a seamless background, other types won’t match.
Finally, fill the Width and Height fields with 1080 px. Overlap: Right in Front and Top in Front.
Step 9.
And you’re still able to edit the artwork! Resize and place vectors as you want. When you feel satisfied with your design, press Done button on the top of your window. From then on the pattern is available in the Swatches panel (Window > Swatches) whenever you need it.
TADA! Your pattern is ready 😊