How to Create a Seamless Watercolor Texture in Photoshop with Ease
Artistic textures are essential for every graphic designer’s toolbox. And what can be more useful than seamless high-res watercolor texture? Indeed, you can overlay any layer using it as a Photoshop pattern! How cool is that? Today I will show you how to create such a texture in 7 easy steps 😉
Step 1
The best place to start with would be a source artwork for our seamless texture. To create it I use watercolor paper (A4 format works for me best), a brush, a container of water and watercolors. If you’re up to something unusual, you can find a tutorial on how to mix watercolors into fantastic backgrounds. I, for this tutorial, would stick to a simple yet catchy combination of yellow and red. You, for a starter, can use only one color. I promise it would still give a nice genuine watercolor texture.
So, after your painting is completely dry, you need to scan it in 300 ppi resolution and PNG format. To save time, you can use my artwork scanned using these parameters:
Step 2
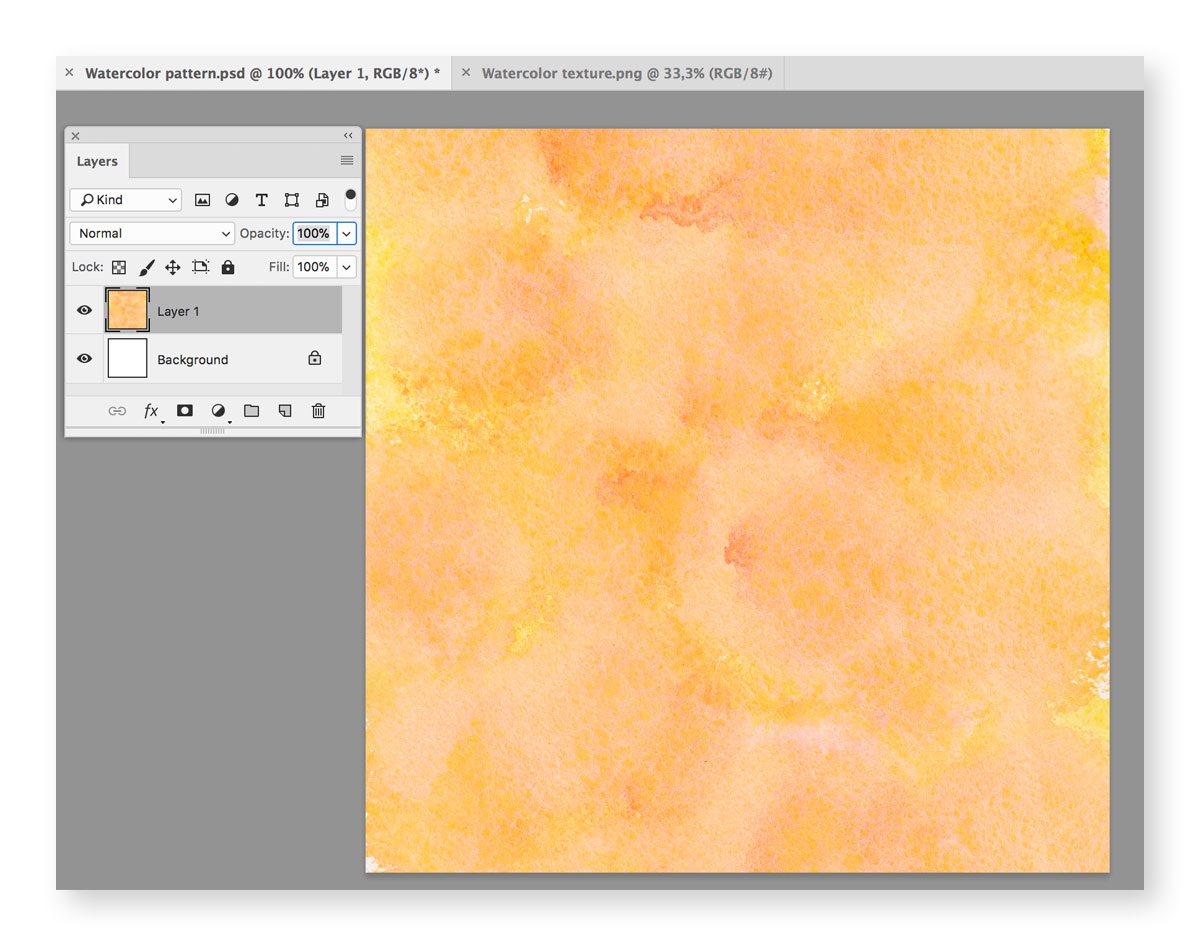
Create a new document in Adobe Photoshop (Cmd+N) with 1200х1200 size and 300 ppi resolution. Open our scanning in Photoshop. Holding left button of the mouse drag and drop it to the created document. You can see it as a Layer 1 placed above the Background layer. At first, it looks a little bit too blurry and grainy. To make it sharper, I resize the layer with artwork decreasing its size (cmd+T).
Step 3.
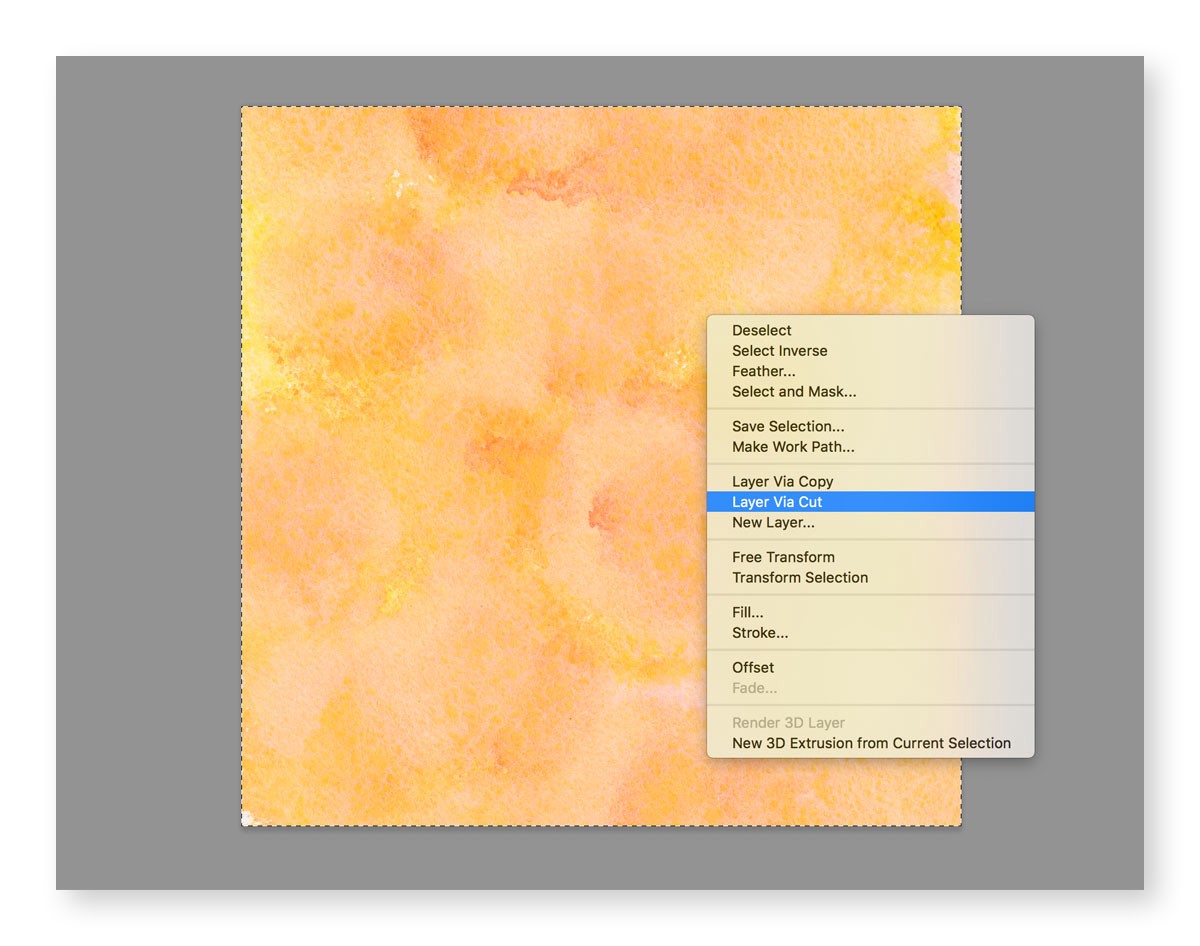
Now, using Rectangular Marquee Tool (M) select the area equal to the size of the artboard. Once the selection is made, right click on it and select Layer Via Cut option from the contextual menu. Now we have a new layer, which we will turn into a seamless pattern.
Step 4.
After that choose Filter > Other > Offset:
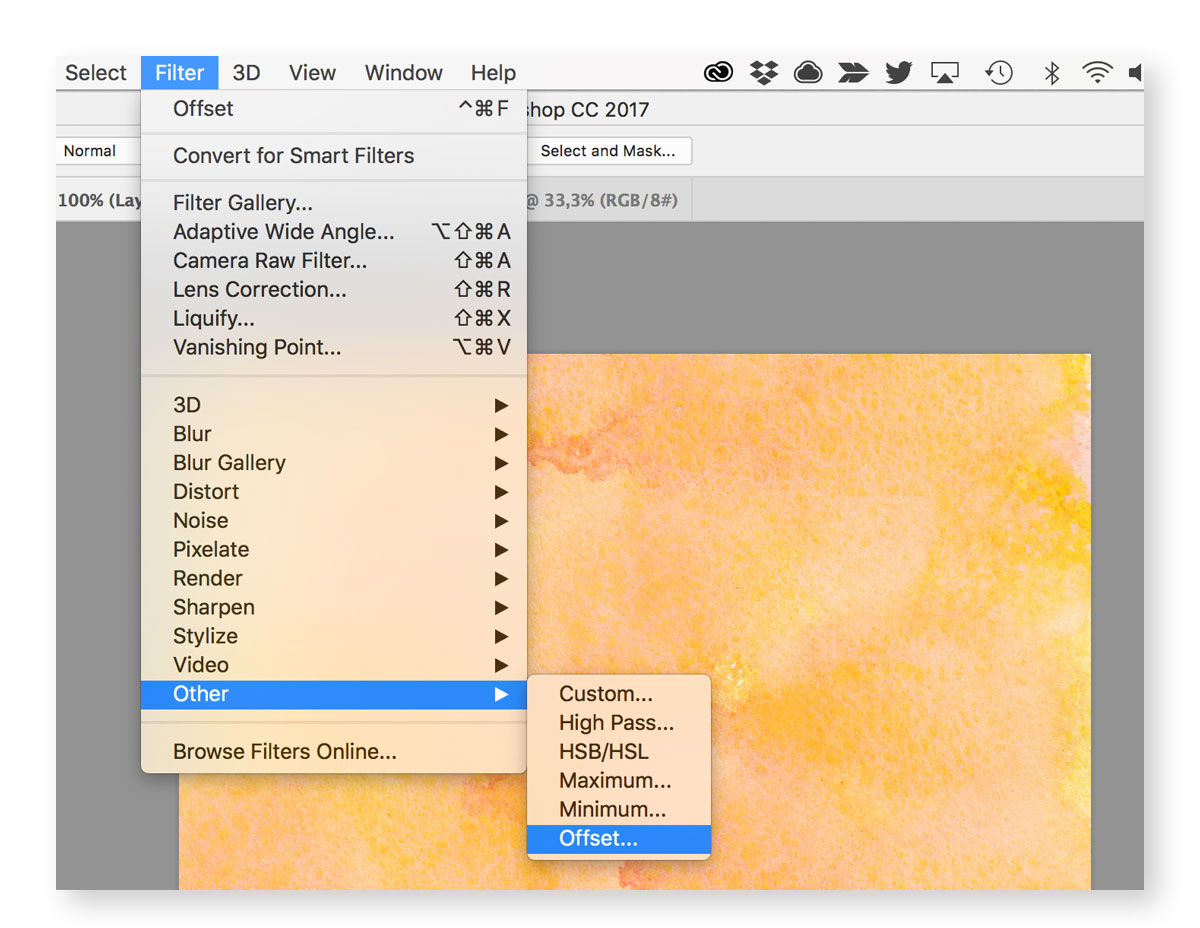
This filter helps us to offset our image horizontally and vertically, allowing us to see where our pattern has its seams. Try to make these 4 squares that we get in the preview equal. Usually, they render equal automatically, but sometimes you should tweak Horizontal and Vertical offsets manually. After you get the result you want, press OK.

Step 5.
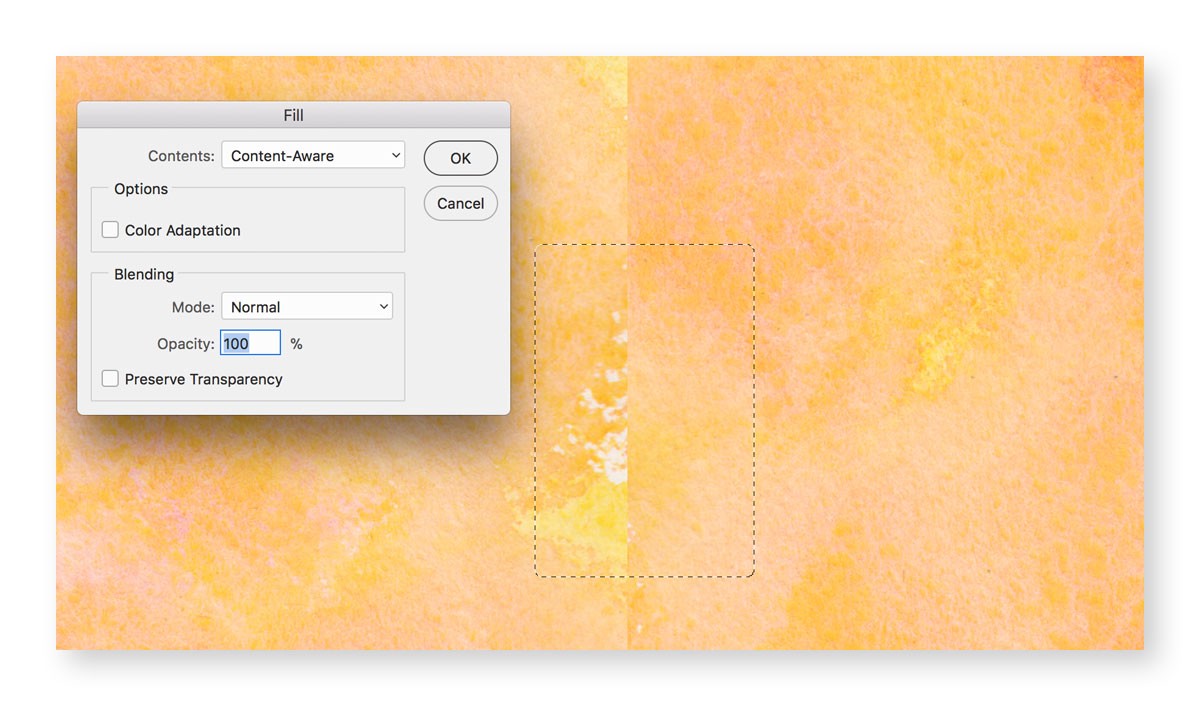
Now our goal is to get rid of the seams and make our texture completely tileable. To make this happen, we will use Rectangular Marquee Tool (M) with Feather parameter on 3 px. Select a small area around the seam with Marquee Tool (M), then press Shift+Delete and here is the parameter of the Fill you should use: Contents > Content-Aware; Mode > Normal; Opacity > 100%. Press Ok or Enter on your keyboard to apply the effect.
Here is what we get after that:

Next, we repeat this step until all seams are gone, to get delighted with how our texture looks. Also, this operation would be helpful if you want to get rid of specks, the hairs from the brush and any other imperfections of the source artwork.
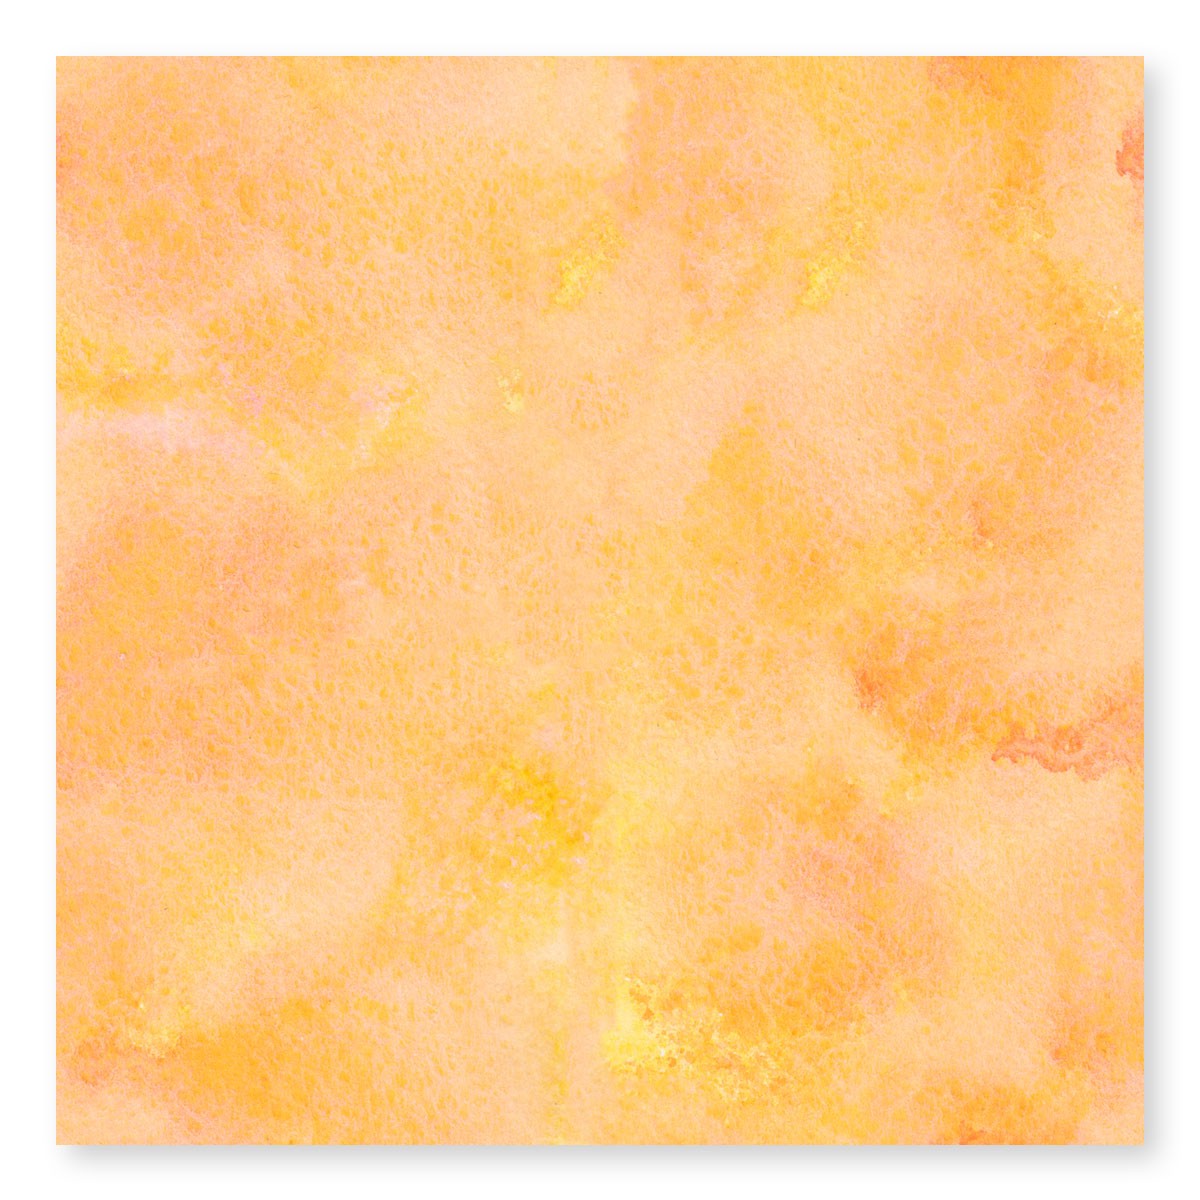
Here is the final result I get:
Step 6.
We go back and repeat Step 4 and Step 5 until the texture on Step 4 is completely seamless. Thus we achieve the result we’ve been looking for.
Step 7.
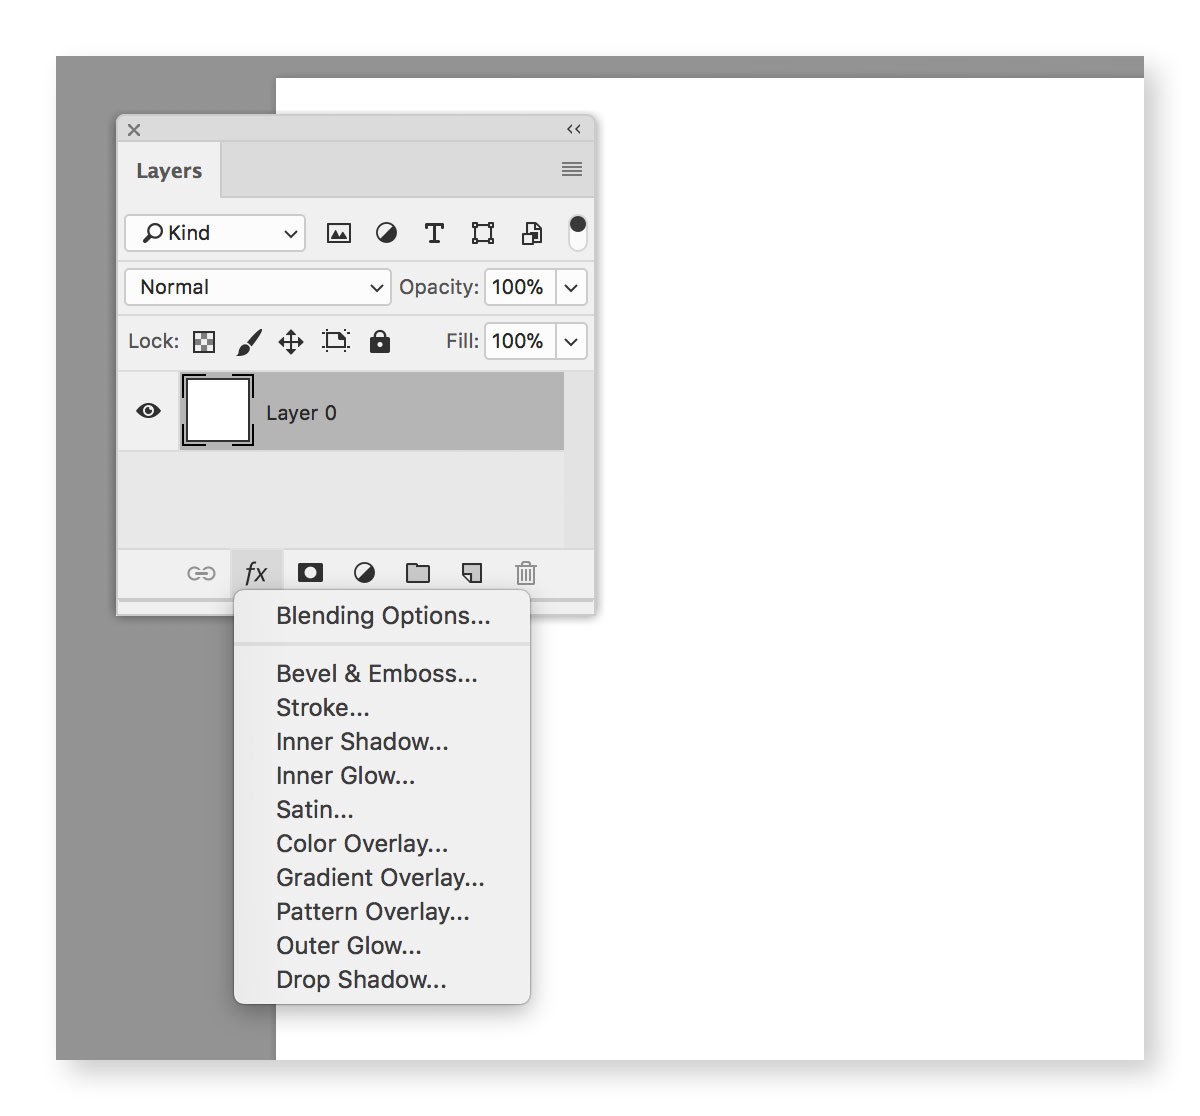
One step left — to create a Photoshop pattern. Define it choosing Edit > Define Pattern > and title it something like Watercolor Pattern. It’s time for a final seamless test. Create a new document twice bigger than ours: 3000х3000 pixels and 300 ppi resolution. Choose an initial Layer and click on fx icon: (Add a layer style) > Pattern Overlay.
Pick our freshly-saved pattern from pattern menu with 100% scale and press OK.

Now we take a long hard look at the canvas trying to detect any signs of seams on the pattern. In case you find some, go back to Watercolor Pattern.psd, find the flaw and remove it using Step 4 and Step 5. After you finish with polishing, you get your seamless watercolor texture.
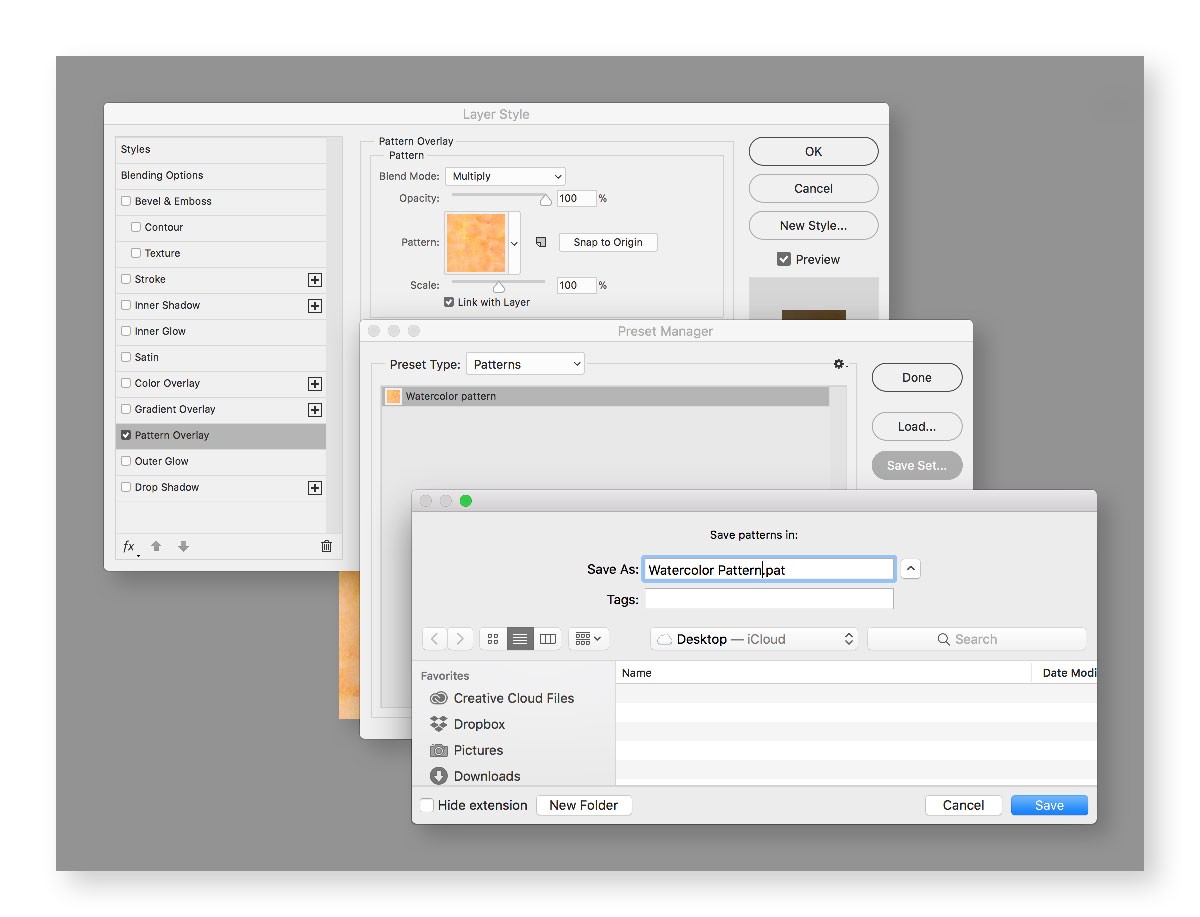
It’s really easy to export our pattern for the further use or sharing. We go back to the Pattern Overlay, and go to Pattern > Present Manager after clicking on the gear icon.
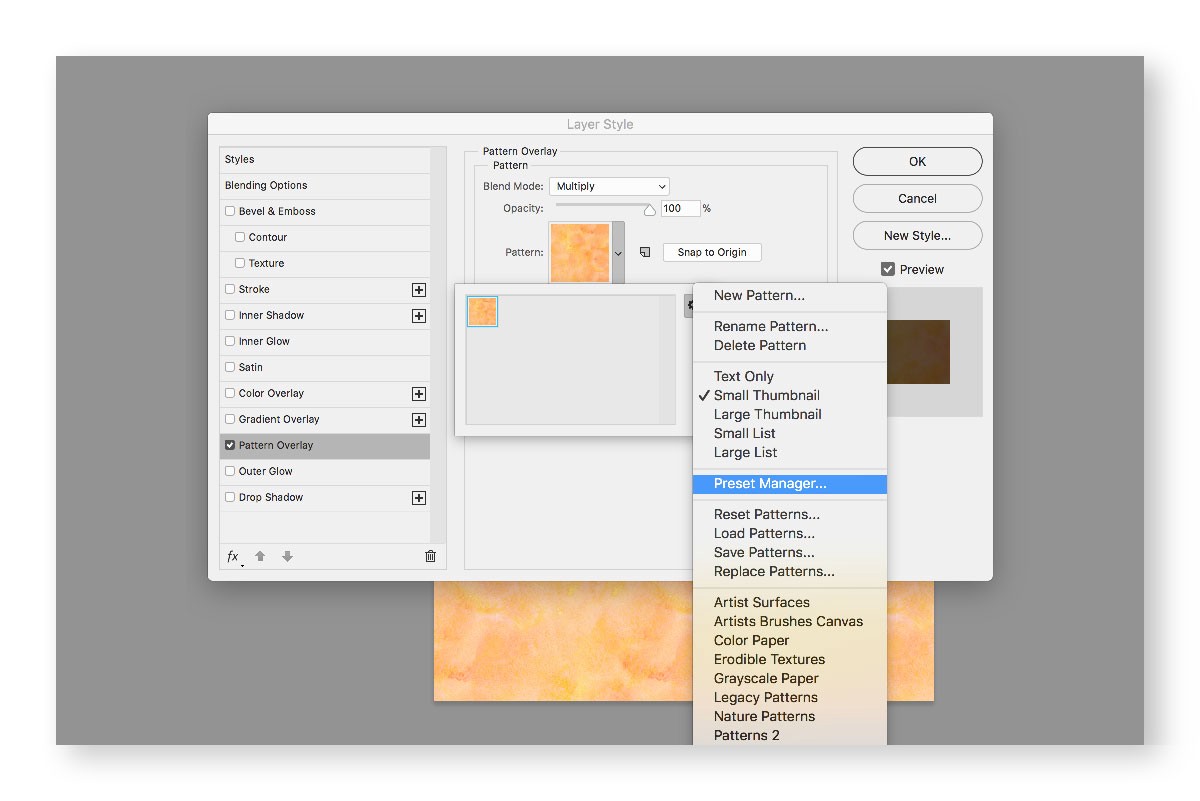
Now we pick our pattern with a left click, choose Save Set > title it Watercolor pattern > Press Save.
Et voilà! We’re done 🙂