How to Create a Seamless Floral Pattern Brush for Illustrator
The more I learn about Adobe Illustrator tools to make my freebie giveaways and premium products better, and design tutorial handier, the more I’m being fascinated by how powerful and infinitely versatile Illustrator’s Brush tool is. Last time, we nailed a tutorial about Floral Pattern Brushes for Illustrator. Today I’ll show you how to create a Seamless Floral Pattern Brush for Illustrator.
Step 1
Like always with vector brushes, to start, we’ll need an initial vector. To make things easier, you can download the one I've prepared, and follow this tutorial step by step, doing the same things I do. Or you can create your unique illustration and use it to create a seamless floral pattern brush with me.
Quick Tip
I recommend to keep original size of the illustrations not very big. Otherwise, it would be tricky to apply your brush to a small square, like 50 x 50 pixels small. Of course, it doesn’t mean you can’t increase it later by tweaking the stroke size. An illustration I work with is 388х146.
Step 2
To make the pattern brush genuinely seamless, we need to make sure that both ends of the artwork are the same size, and adequately aligned to perfectly fit each other. So, open a vector artwork edited according to Step 1 in Adobe Illustrator. Don’t mind the size of an artwork, it doesn’t matter. As you can see, my vector has outstanding stem element which will help me to tile it with the next vector.

The initial vector illustration
Next, align the illustration vertically by rotating it around the vertical line (to set it, turn on Artboard Rulers with Cmd+R hotkey and drag a guideline from a vertical ruler to the artboard.)

Aligning the illustration straight vertically
Using Rectangle Tool (M), create a rectangle shape a little wider than the top element of our illustration, and overlap it with this rectangle, just like on the screenshot below.
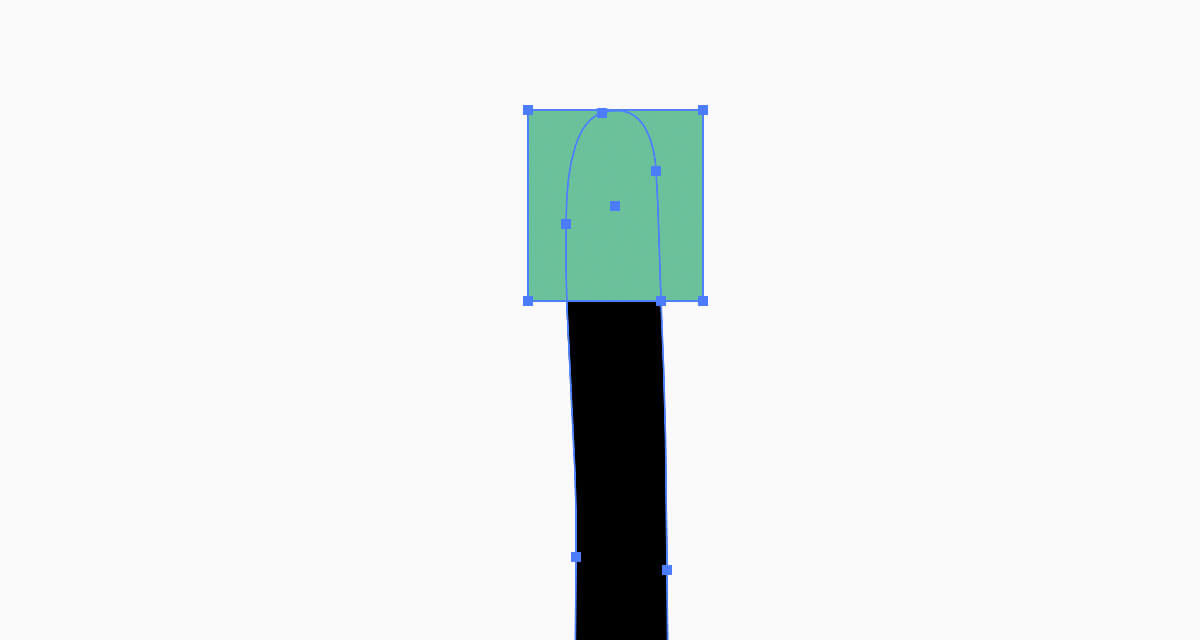
Now, we need to cut off the overlapping area from the illustration to get a perfect slice. To make that, select both vector elements and use Pathfinder (Window>Pathfinder > Divide), and then remove the rectangle and the part it has overlapped by selecting them with Direct Selection Tool (A) and pressing Delete. Thus, the top end of the illustration is ready.
Step 3
Next, we’re editing the bottom end of the illustration for the perfect tile. Just repeat what we've done with the top end in Step 2: Create a rectangle using Rectangle Tool (M), select both illustration and the rectangle, choose Pathfinder (Window>Pathfinder>Divide) but this time, remove only the rectangle we’ve created.

Select the separated segment of the top end with Direct Selection Tool (A), copy (Cmd+C) and paste it (Cmd+V) reflecting horizontally (Object > Transform > Reflect > Horizontal > OK) and vertically (Object > Transform > Reflect > Vertical > OK).
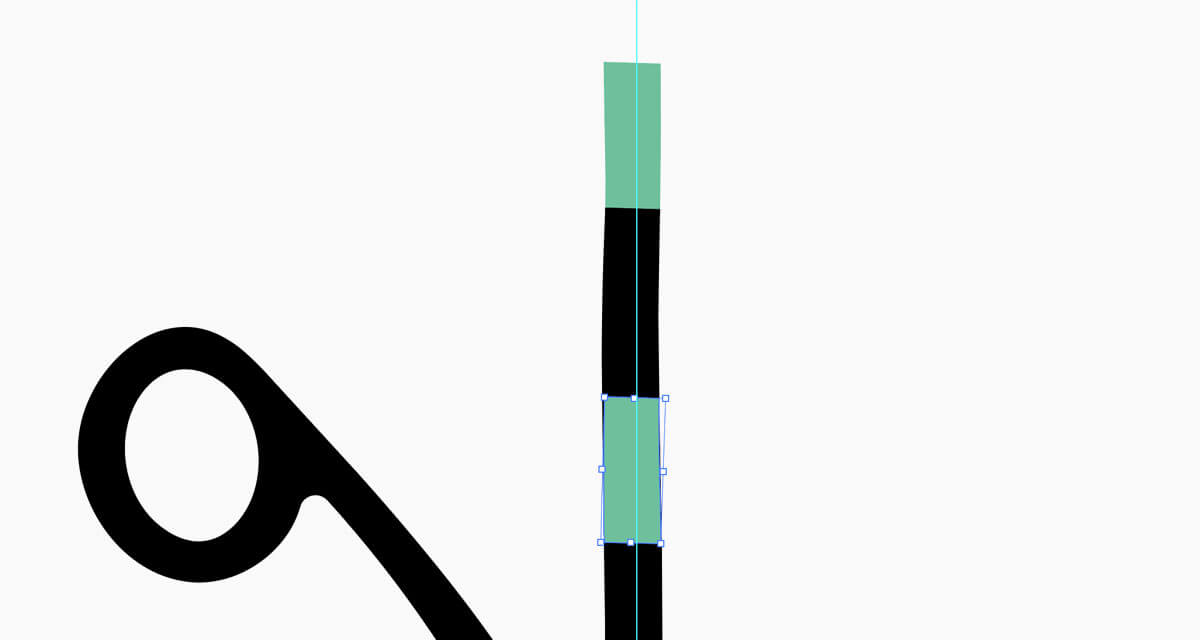
Using Down key (hold Shift to move objects faster) or by simply dragging it with your mouse (in this case, hold Shift to move it straight vertically) move the copy of the segment to the bottom of the illustration.
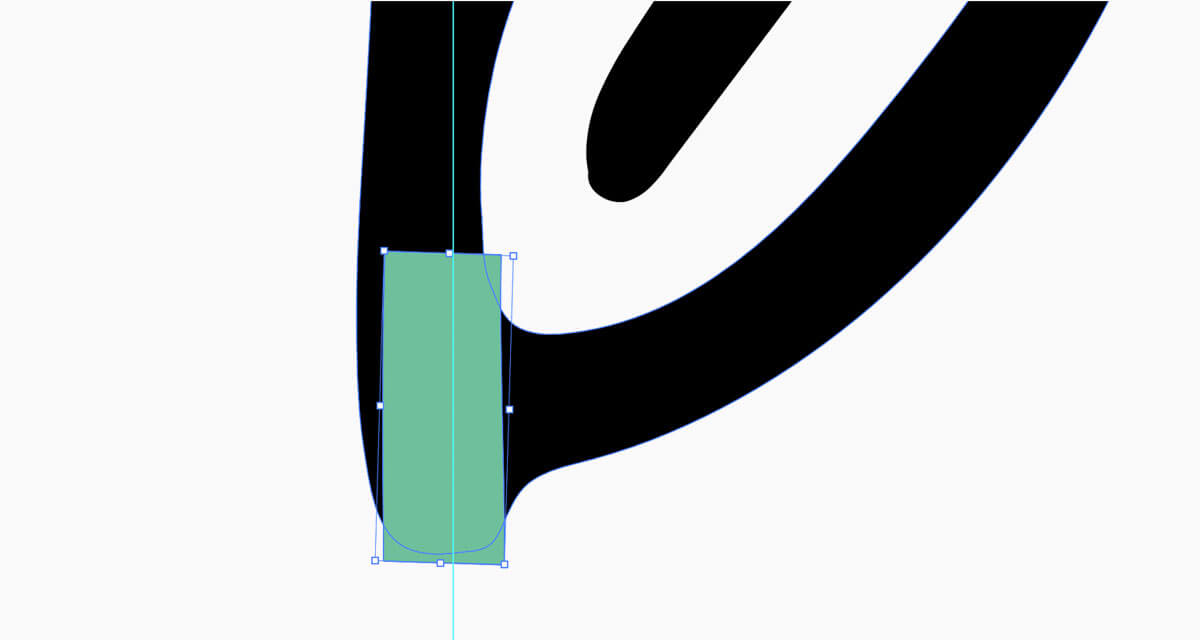
As you can see from the screenshot above, the top end of the illustration is very different from the bottom end. That’s what we’re about to fix! Select your vector illustration, and the segment we have moved, then choose Pathfinder > Unite. Make sure, the combined illustration filled with black color: select the whole shape with Direct Selection Tool (A) and set color (Window > Color) to #000000.

Now, Pencil tool (N) will help us to fix the bottom end without breaking its shape, to make it tileable with the top end. Using Direct Selection Tool (A), select the illustration and make the areas indicated on the screenshot smoother with Pencil (N).
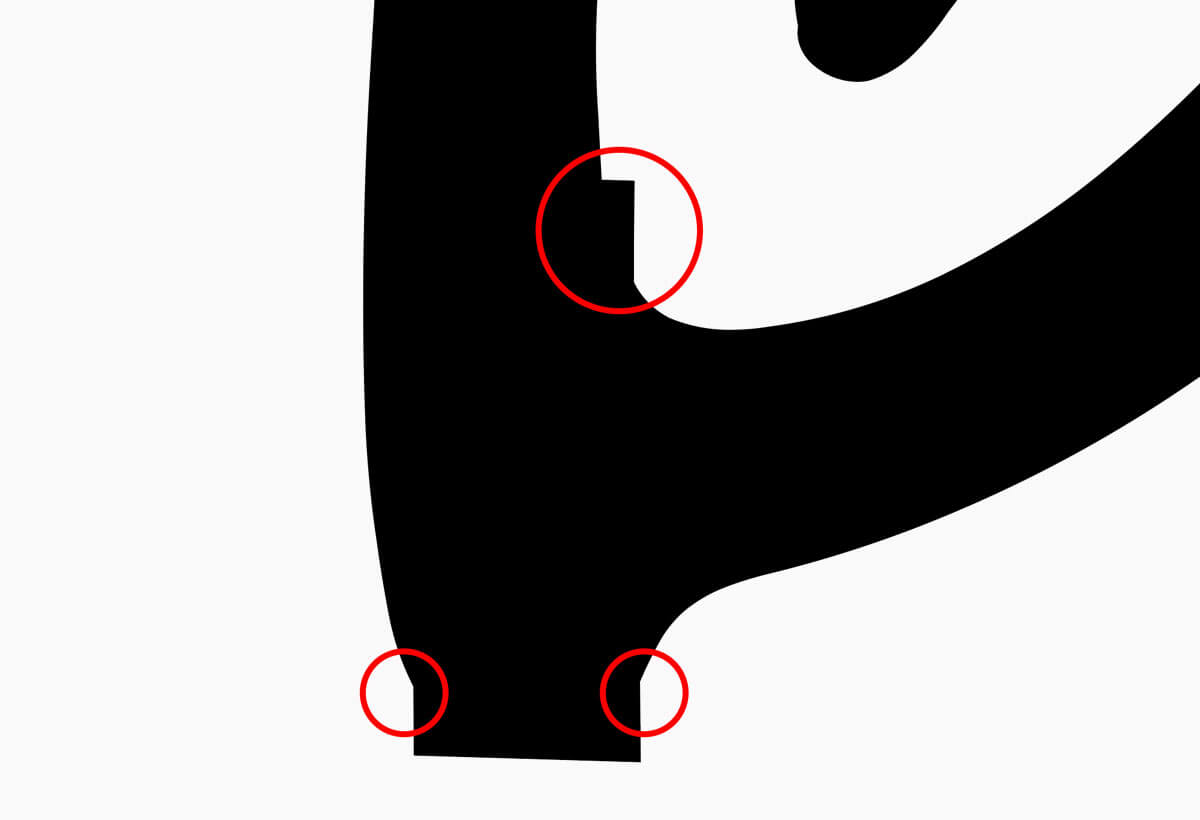
To make it look like this:

Using guideline, make sure that the bottom end of your illustration is strictly horizontal. If it’s not, fix it with Direct Selection Tool (A) by dragging anchor points on the same line.

Step 4
It’s time to create a Pattern Brush! Select the vector illustration, rotate it at 90° and choose Brushes (Window > Brushes) > New Brush.
Select Pattern Brush in the pop-up window. What you see next is a Pattern Brush Options window.
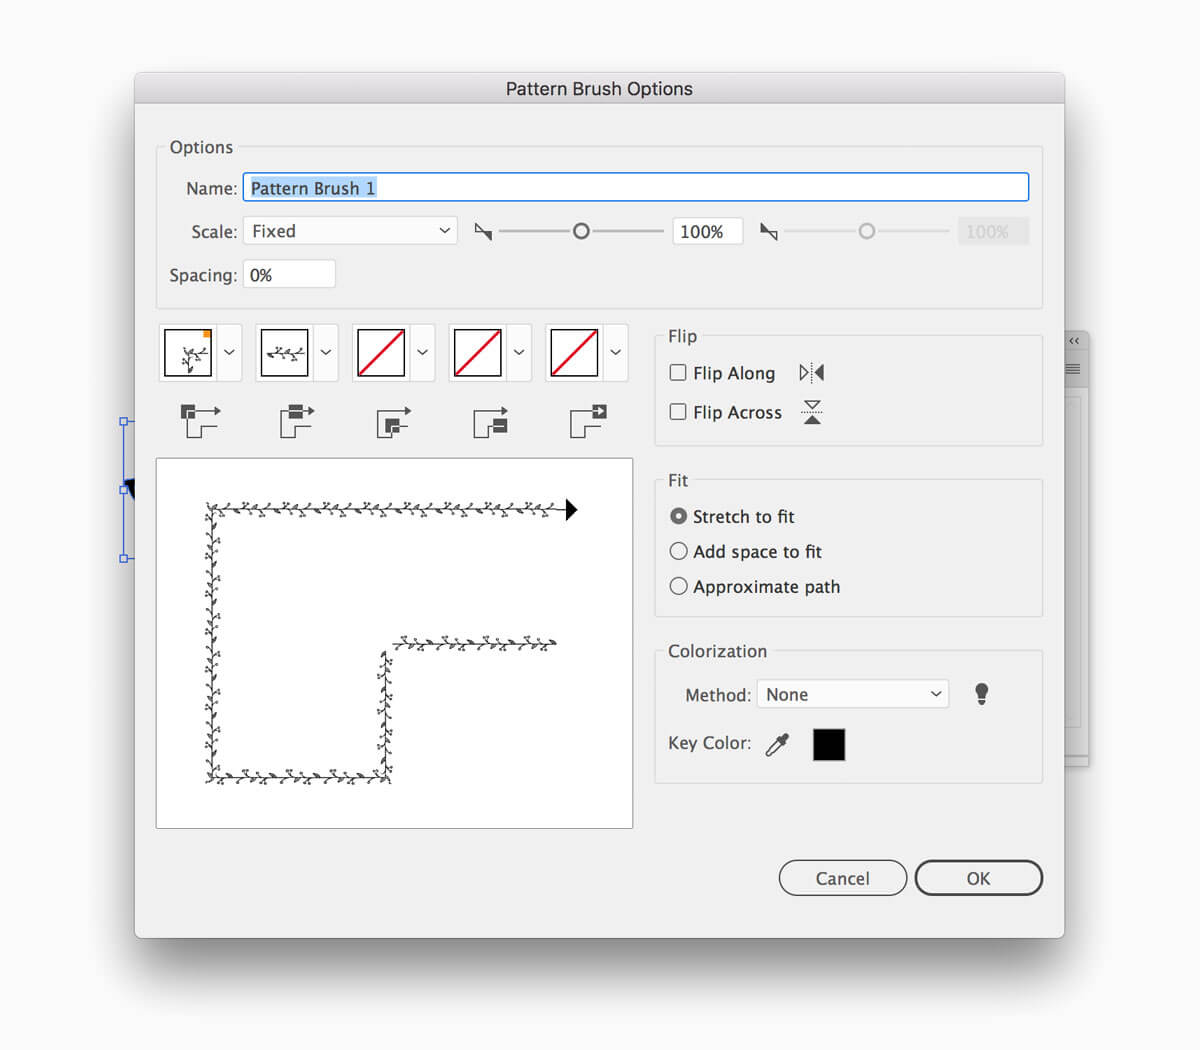
Here, you can title your brush, set scale, spacing between repeating elements, all five brush tiles, flip, fit, and colorization (if you’re about to create a colored brush, set Method option to None). Tweak around these options, and after you get the most satisfying result (you can see the preview in the left half of the window), press OK.
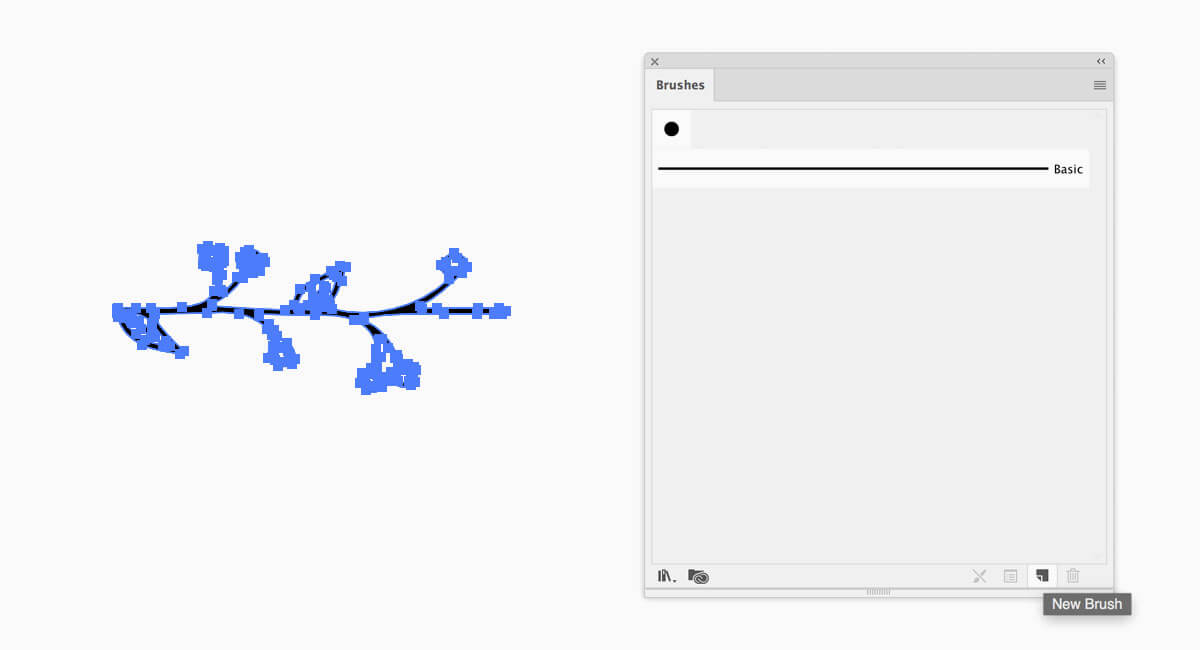
Now you can find your new brush in the Brushes panel:

It’s always available for editing from Options panel, which can be opened by double left click on your brush. Thus, we’ve created the first of 5 tiles for the Seamless Pattern Brush — Side Tile.
Now it’s a moment to slow down and take a look at the Pattern Brush anatomy. It consists of 5 segments: Outer corner tile, Side tile, Inner corner tile, Start tile, and End tile. By picking and preparing the illustration for you brush as we have done in Steps 1–4, you’re setting a Side Tile. Outer corner tile and Inner corner tile (which would define outer and inner corners if you apply the brush to some squarish shape) will be built automatically in a few versions. You can pick the ones to your liking in the Options panel. Start tile and End tile are the ones you have to create yourself (or just leave these tiles empty).
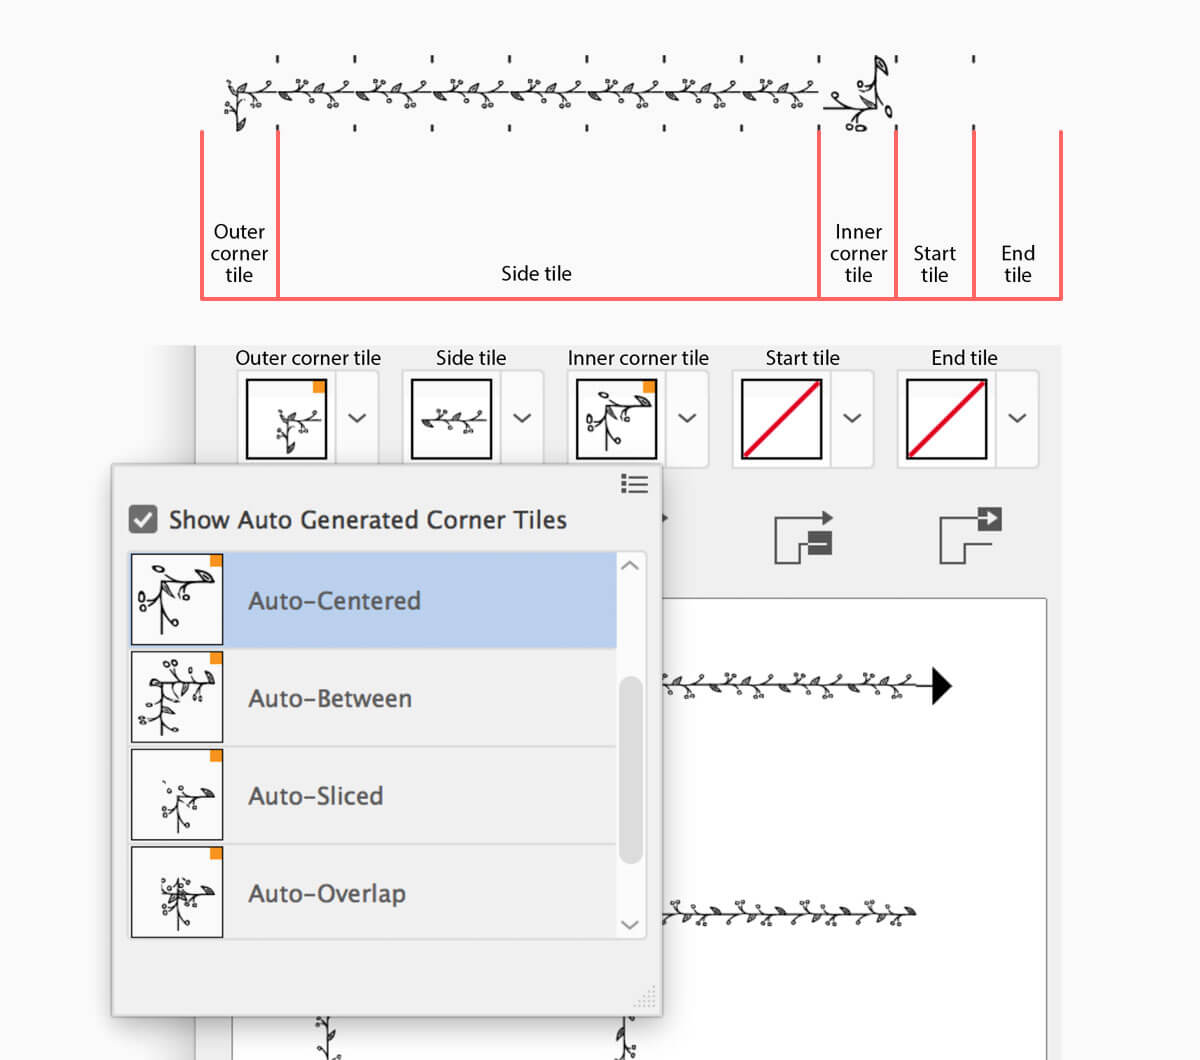
Of course, you can draw from the scratch and set each 5 tiles of the Pattern Brush. To make that, create a new brush (Steps 1–4), then gradually drag’n’drop your vector illustrations to outer corner tile, inner corner tile, start tile, and end tile.

Let’s compare these two approaches. Here is what you get when you apply pattern brush with only one illustration for Side tile:
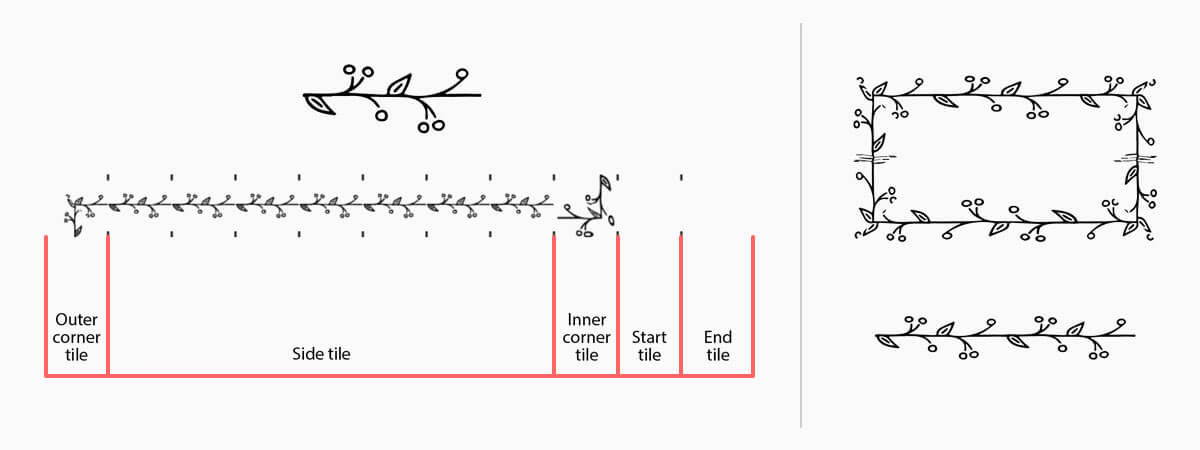
On the right, you can see automatically generated Outer corner tile and Inner corner tile with no Start tile и End tile set.
And here is what you get if you create and set hand-crafted elements for all 5 tiles:
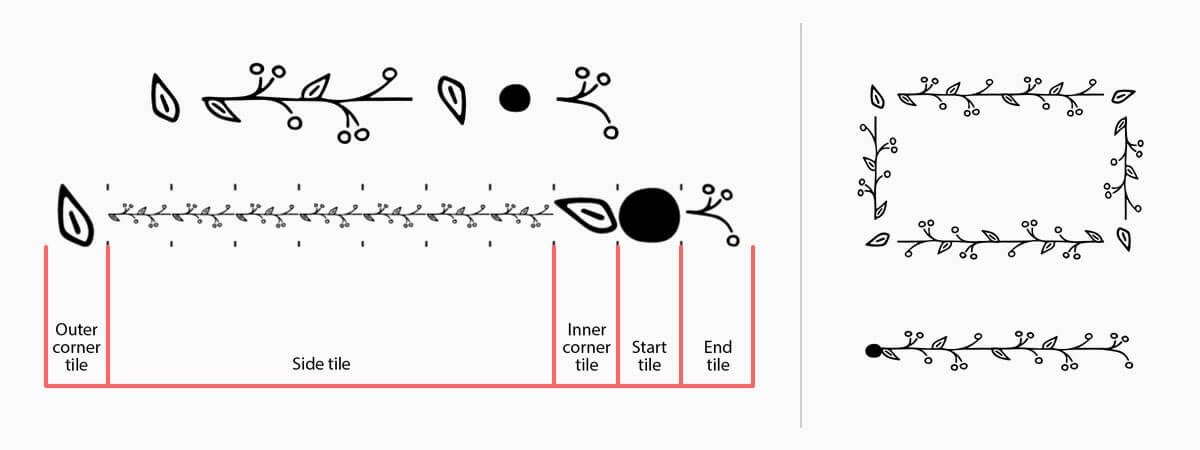
After looking at this screenshot, you might ask why I wouldn’t create Corner tiles to not just match but connect with Side tiles seamlessly? Unfortunately, it’s just impossible in Adobe Illustrator. Unlike automatically generated ones, they just won’t tile, no matter how perfectly they fit before you add your artworks to Corner tiles.
Step 5
Exporting the brush file is the easiest part. Just open Brushes panel (Window > Brushes), open top-right menu and choose Save Brush Library.
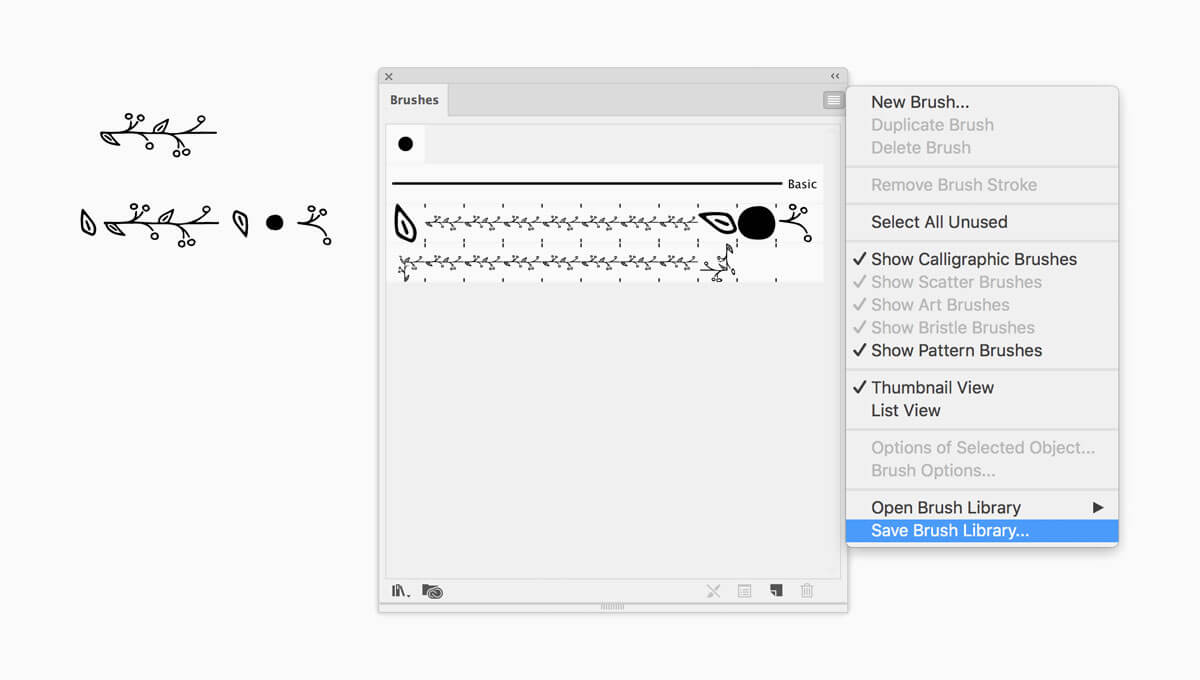
Now, pick the directory to save your file to, title it and press Save. That’s it! Whenever you need your brush, just upload it to your document from the Brushes panel. All you need to do is to open the top-right menu and click Open Brush Library > Other Library and browse your brushes file.
Have fun to use this tutorial and create your unique pattern brushes 😉